 Course Web
EdcG 630
Course Web
Item |
For Adults |
For Children |
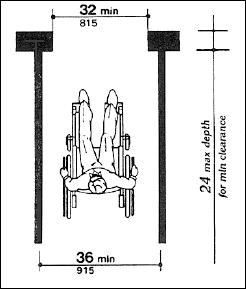
Door width |
32 inches, see figure 1 |
|
Aisle width |
36 inches, see figure 1 |
36” min. preferred 44” or more |
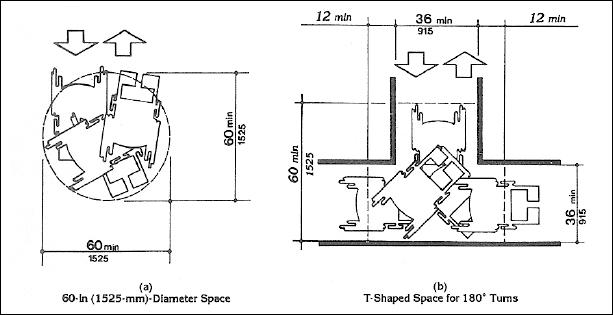
360 degree turning radius |
5 square feet, see figure 2 |
5’ x 5’ |
180 degree turning radius |
36 inches onto 36 inches, see figure 2 |
36” x 36 |
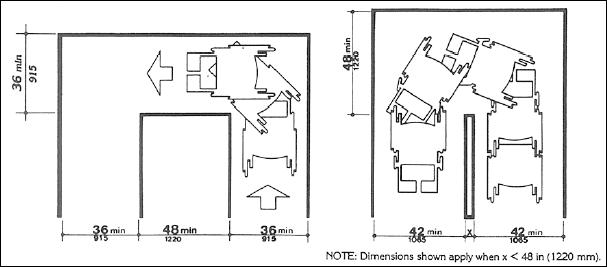
Turning around a stationary object |
see figure 3 |
|
Stationary space |
30 x 48 inches |
30 x 48 inches or more |
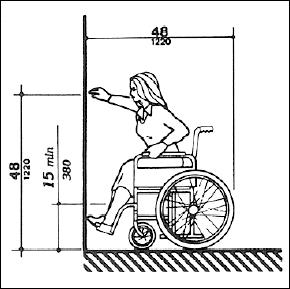
Forward reach |
15 inches min. – i.e., reaching for a book off a bookcase, see figure 4 |
Min: 16” – 20” Max: 36” – 44” |
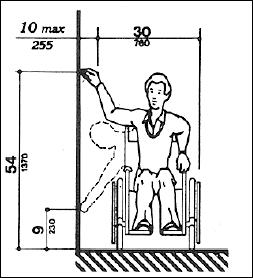
Sideways reach |
9 inches min down, see figure 5 |
Min: 16” – 20” Max: 36” – 44” |
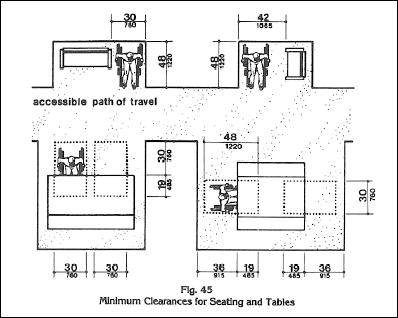
Table Height |
34” max to top of table |
31” max. to top of table |
Table Knee Space |
27” high, 30” wide, 19” deep |
24” high, 30” wide, 17-19” deep |
Ramp ratio |
1:12” |
1:16 |
![]()